Making animated GIFS from your still photos is easy. All you need is a few good shots and Adobe Photoshop. Adding motion to your website or instagram feed can really boost engagement and helps bring your portfolio to life. I’ve had several of my clients come to me specifically requesting GIFS during their photoshoot. Knowing how to do this may help you up-sell yourself too. Often I’ll suggest doing some setups for making GIFS and bill extra for the editing process. Watch the video below, or just follow the step by step instructions I’ve written out!
Step One: Loading your photos into a “stack”
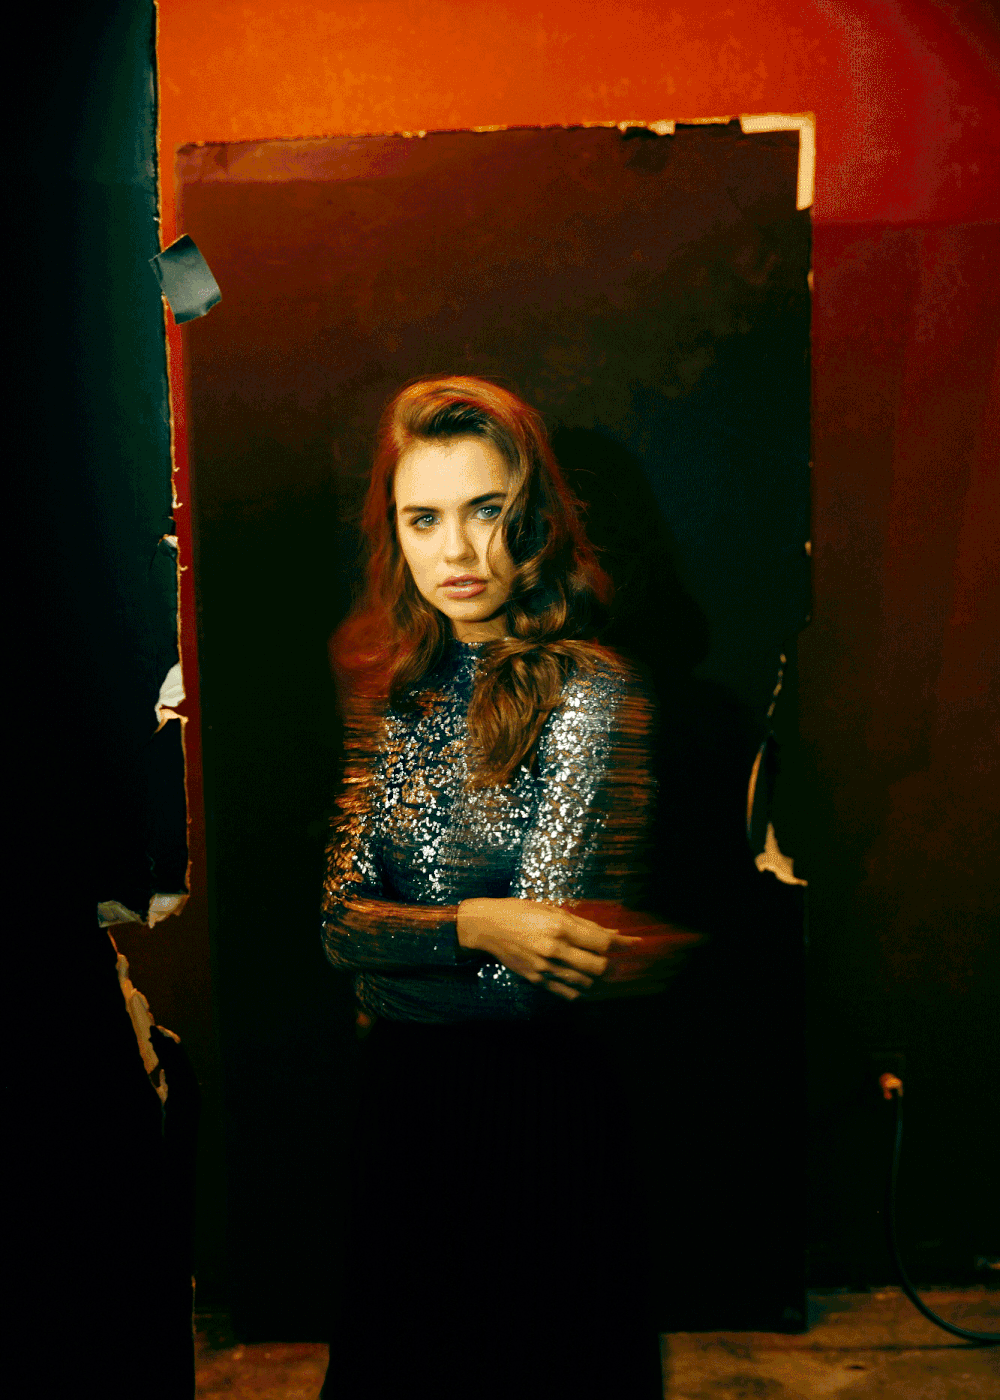
Firstly, you need a series of at least 3-5 photos that are ideally all shot from the same point of view. You want your subject to move, but you don’t necessarily want the camera to move. I usually put my camera on a tripod and use the remote trigger in burst mode while I direct how I want my subject to move.
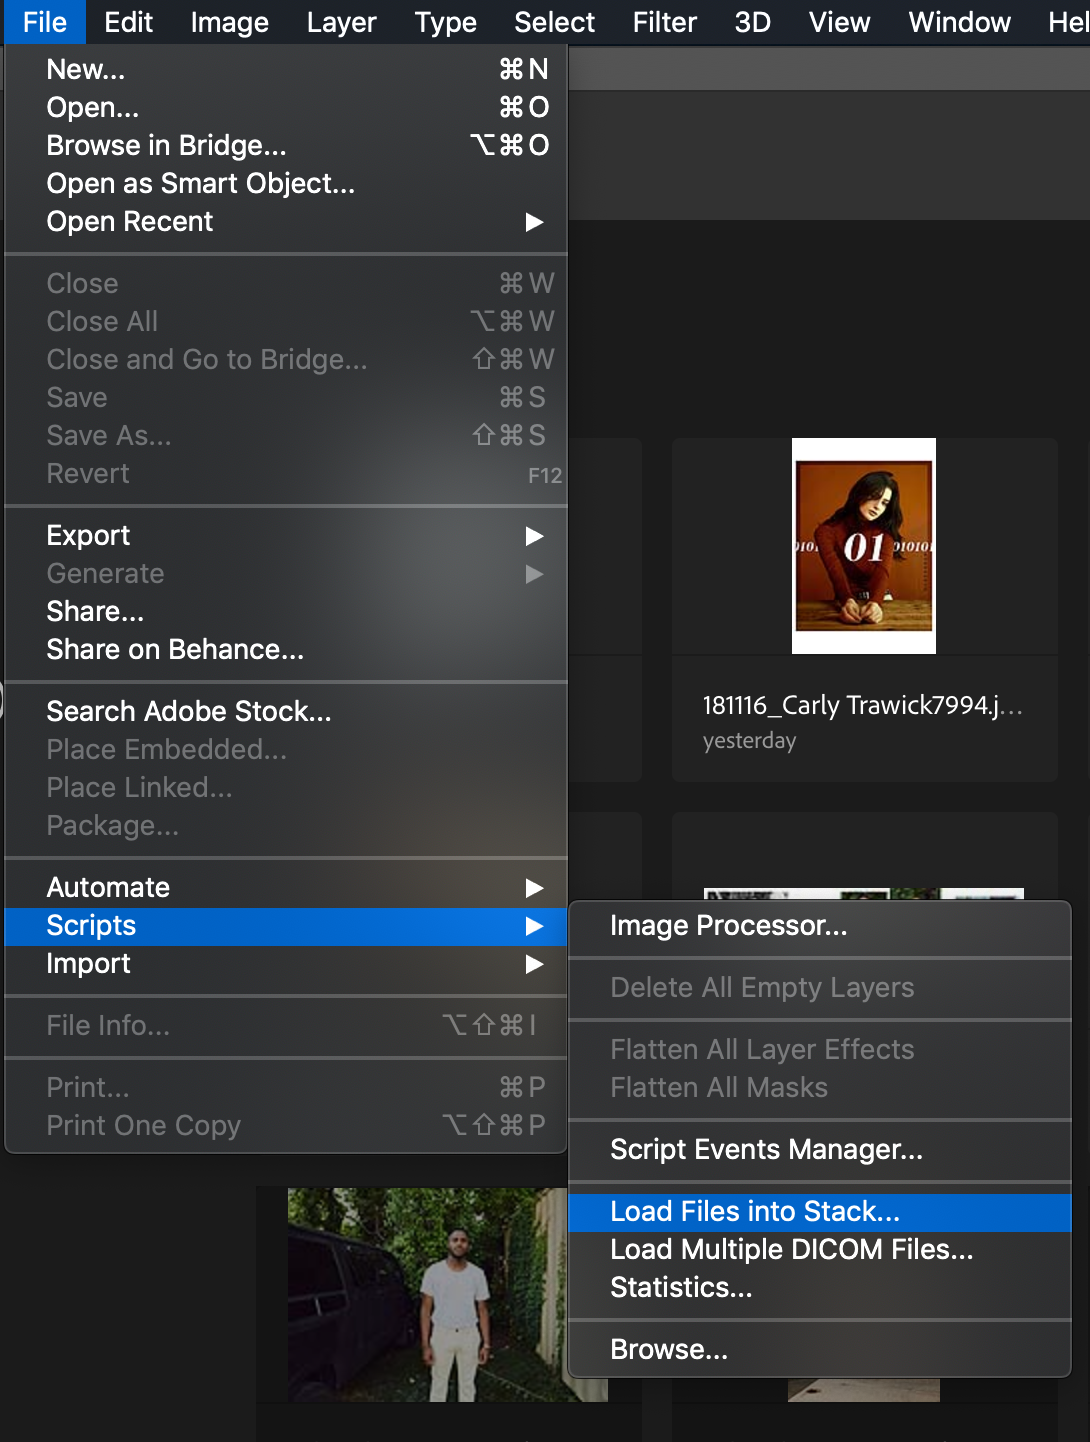
Once you have your series of still photos, you need to open Photoshop, navigate to “File” and select Scripts > Load Files Into Stack.
From there, select “Browse” and find the files you want to use. Once you’ve loaded them, hit “OK” and your files will load into a series of layers.
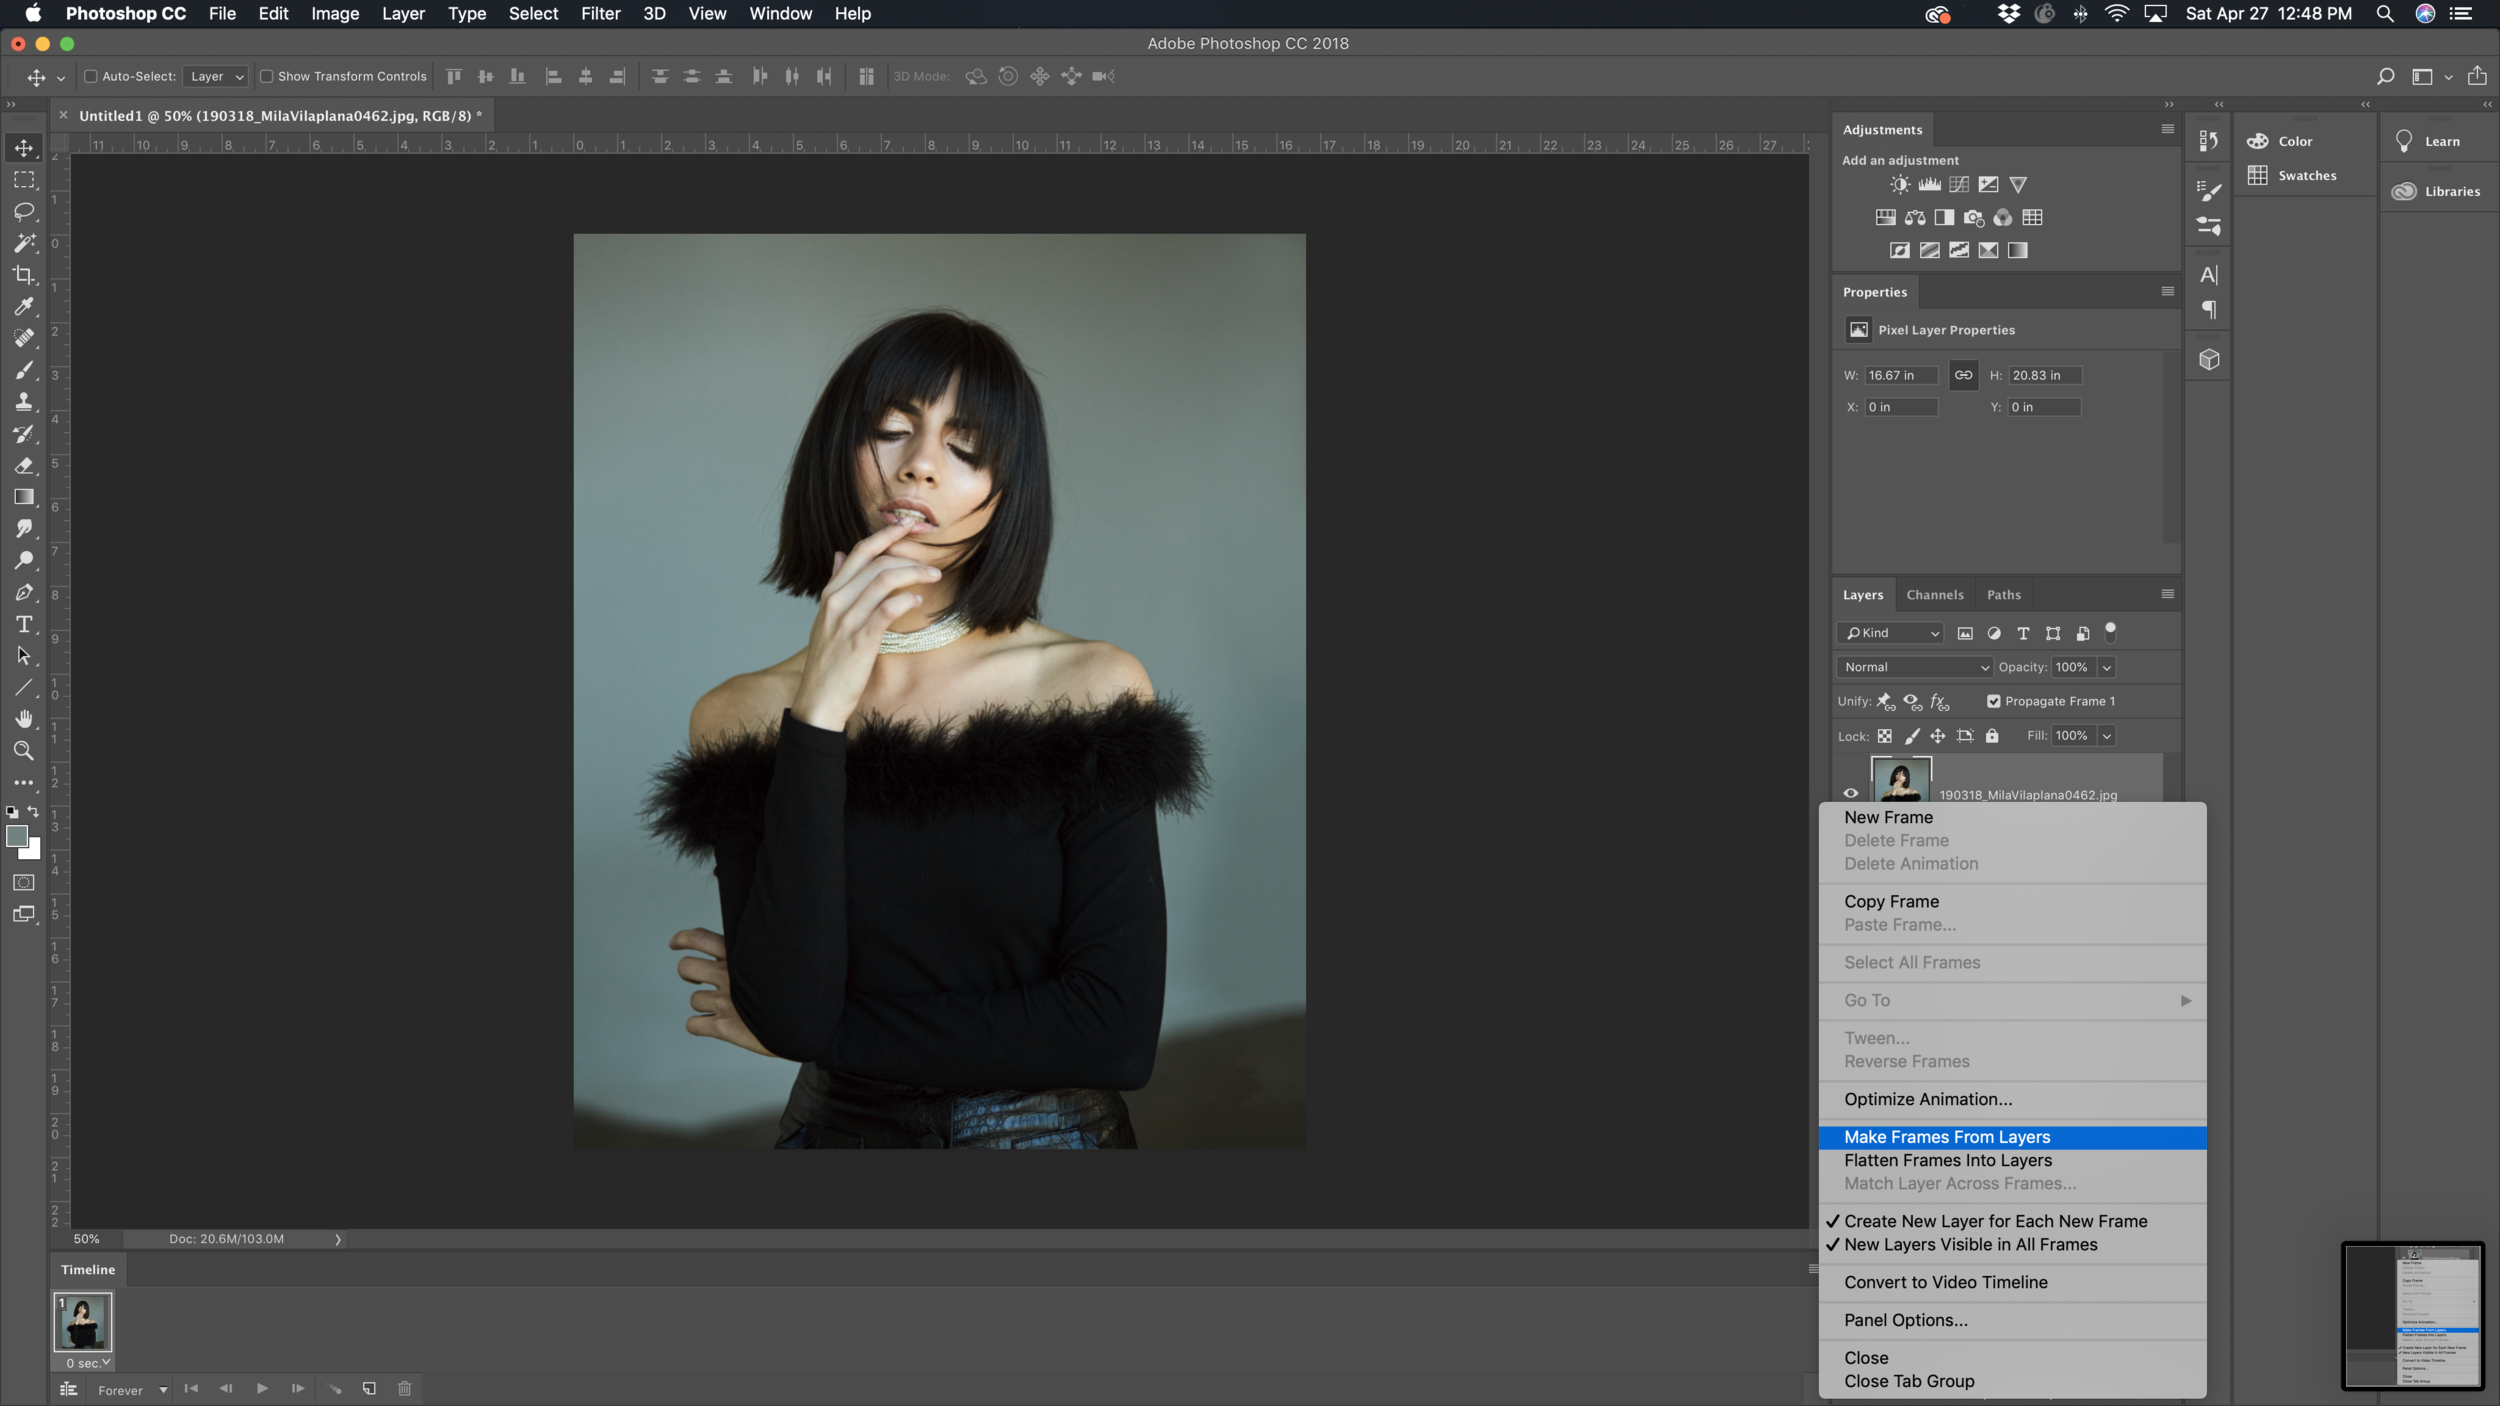
Next, you need to open the “Timeline” dialogue. Navigate to “Window” , its near the end of that list. Once you have the timeline opened, you need to select “Create Frame Animation.” That will load your first layer into the animation timeline. Find the drop down menu on the right hand side of the timeline. In that dialogue, select “Make Frames From Layers.”
Now you should have all of your layers loaded into the timeline.
Step Two: Exporting your GIF
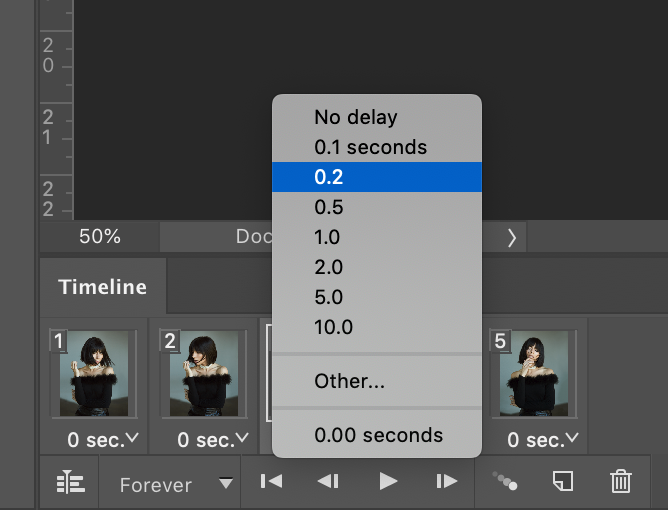
Now that you have all your photos loaded into the timeline, all you need to do is decide on a frame delay, and then export the finished animation. Each photo in the timeline has a dropdown menu where you can select the time between each transition. You can leave it at 0 seconds for a very fast and very smooth (depending on how many transition frames you have) animation. For the example I’m using, I set the delay to 0.2 seconds so the transitions would be slower and more choppy.
The last thing you’ll need to do is export the GIF file. To do that, go back to “File” and select Export > Save for Web (Legacy).
This dialogue can look at little overwhelming at first glance but there’s really only three areas you need to look at.
Colors: Colors dictates how many colors will be represented in the spectrum or gamut of your final animation. Leave this as high as possible (256) for best results. Lowering the colors will make for a smaller file, but much worse quality.
Dither: Dithering is the process of juxtaposing pixels of two colors to create the illusion that a third color is present. Again, lowering this number will make for a smaller file size in the end, but will also create a choppier looking GIF.
Image Size: This is probably the most important part, which will have the greatest effect on your file size. I like to keep my file sizes between 2500 - 4000px/in on the long edge.
Try to keep your file size below 20mb. You can see how large the final export will be in the lower left corner of this dialogue. Anything bigger than 20mb is going to be annoying to upload and slow for viewers to load in their browsers.
That’s it! Now that you’ve got your export setting dialed in, click Save and export your GIF.
Step 3: Exporting a .MP4 for Instagram (Optional)
A GIF file will load and play just fine on your website or in a browser, but if you want to upload your animation to Instagram you’ll need to export it as a movie file, because Instagram doesn’t support .gif file types.
Before your export your video file though, you need to make a change to the file itself. Movie files won’t play your animation on a loop forever like a GIF will, but I have a workaround. Before you “Make frames from layers”, duplicate your layers a number of times. For my example I made 5 duplicates of my original 5 layers. You can duplicate layers by selecting all, then Command C > Command V.
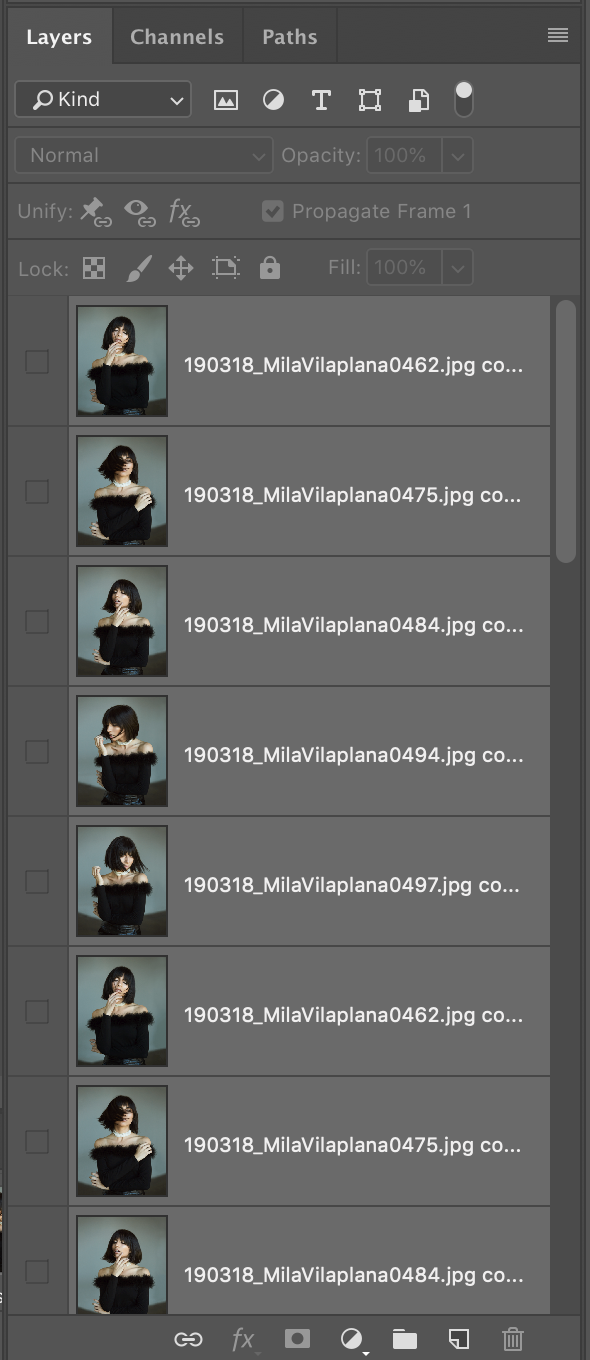
Now your layers panel should look like this.
Make frames from layers again. This time you should have a much longer series of photos in the timeline. This is your new loop. Instead of telling Photoshop to play the same series of photos on a loop forever, it’s going to tell this long series of repeated photos to loop just once, but that one loop will be longer because of the redundant series of photos.
Now you can export the file as a movie. Select File > Export > Render Video. You shouldn’t need to make any changes in this dialogue. Hit “Render” and you’re done!
The only downside to this method is it will put a black border on your video if the photos you’re using are portrait orientation. If anyone knows a work around for that, please let me know!
I hope this guide helps you to create some amazing animated GIFS using still photos!
Matthew is a commercial portrait photographer specializing in music/entertainment and editorial photography based in Nashville, Tennessee